4.28.2013

Elephants and Birds and Babies - Oh My!

I had the pleasure of creating baby shower invitations for one of my dearest and oldest friends, Dodie. She is having twin boys! Her mother-in-law asked me to design an invitation to reflect the nursery theme that Dodie has chosen - navy, gray and white, chevron pattern and elephants. Adorable!

Before I begin designing any baby shower invitation, I always consult the couples' baby registries first. I look at the bedding chosen, the colors and patterns and evaluate the overall look and feel of the items on the registries. In this case, the below Pottery Barn Kids bedding along with the chevron patterned sheets chosen by the parents were my inspiration.


I was immediately drawn to the elephants ... it is a baby inspired design concept but the gray and white color scheme adds a touch of sophistication. The navy and white chevron sheets chosen add a contemporary element to create an overall modern, yet baby-friendly design. My mind immediately ran wild with design ideas!

After many drafts and concepts - I couldn't help but design over 10 options - my friend's mother-in-law selected the below design for the baby shower invitation.


I chose to go with a deep navy background and drew a mama elephant and two baby twin elephants. I added the yellow birds as a pop of color - again, a mama bird and two twin baby birds. The elephants and birds were drawn with a nod to the critters on the bedding. I searched furiously for chevron ribbon to represent the chevron design in the babies' sheets and FINALLY found this gray and white ribbon at Hobby Lobby. I also incorporated a cute little statement "There's two to kiss and two to hug and best of all there's two to love". The inside of the invitation stated all of the details of the shower.

I have to say, these invitations turned out pretty freakin' cute! An invitation is always more personal when created with love for an individual, and in this case, for a very deserving couple who will undoubtedly make the most wonderful parents to these two little twins! This is a one-of-a-kind design inspired by the top-notch taste of this future mother, and I am thrilled to be able to be a part of the welcoming of these gifts of God to the world.

In addition to this shower invitation, I also had the pleasure of creating wall art for the twins' nursery per request of the mother. Dodie had seen some art on Etsy that sparked her interest ... instead of purchasing prints offline, I was able to create one-of-a-kind art, once again, for the nursery using design elements from the above invitations. Does that elephant and bird look familiar?


I simply used one elephant and one bird from the invitation and positioned them over a chevron background. I designed the art in Adobe Illustrator - all of the elements are hand drawn by me in the design program. As I said before, the elephant and bird coordinate with the bedding, so this art should add a nice design element to the nursery. The art is 16x20", cut into four 8x10" prints, framed individually in thin, white frames from Michael's. Michael's is the BEST place to buy frames - they have a variety of options to fit any budget, and there is almost always a coupon available.

I can't wait to see my art hung over the twins' baby changing table!

I am honored to have created these pieces for such an important person in my life and for the two babies that are sure to bless these new parents daily. Congratulations to the future parents - I can't wait to meet the twins!

4.25.2013

An Omelet Maker - How Convenient!

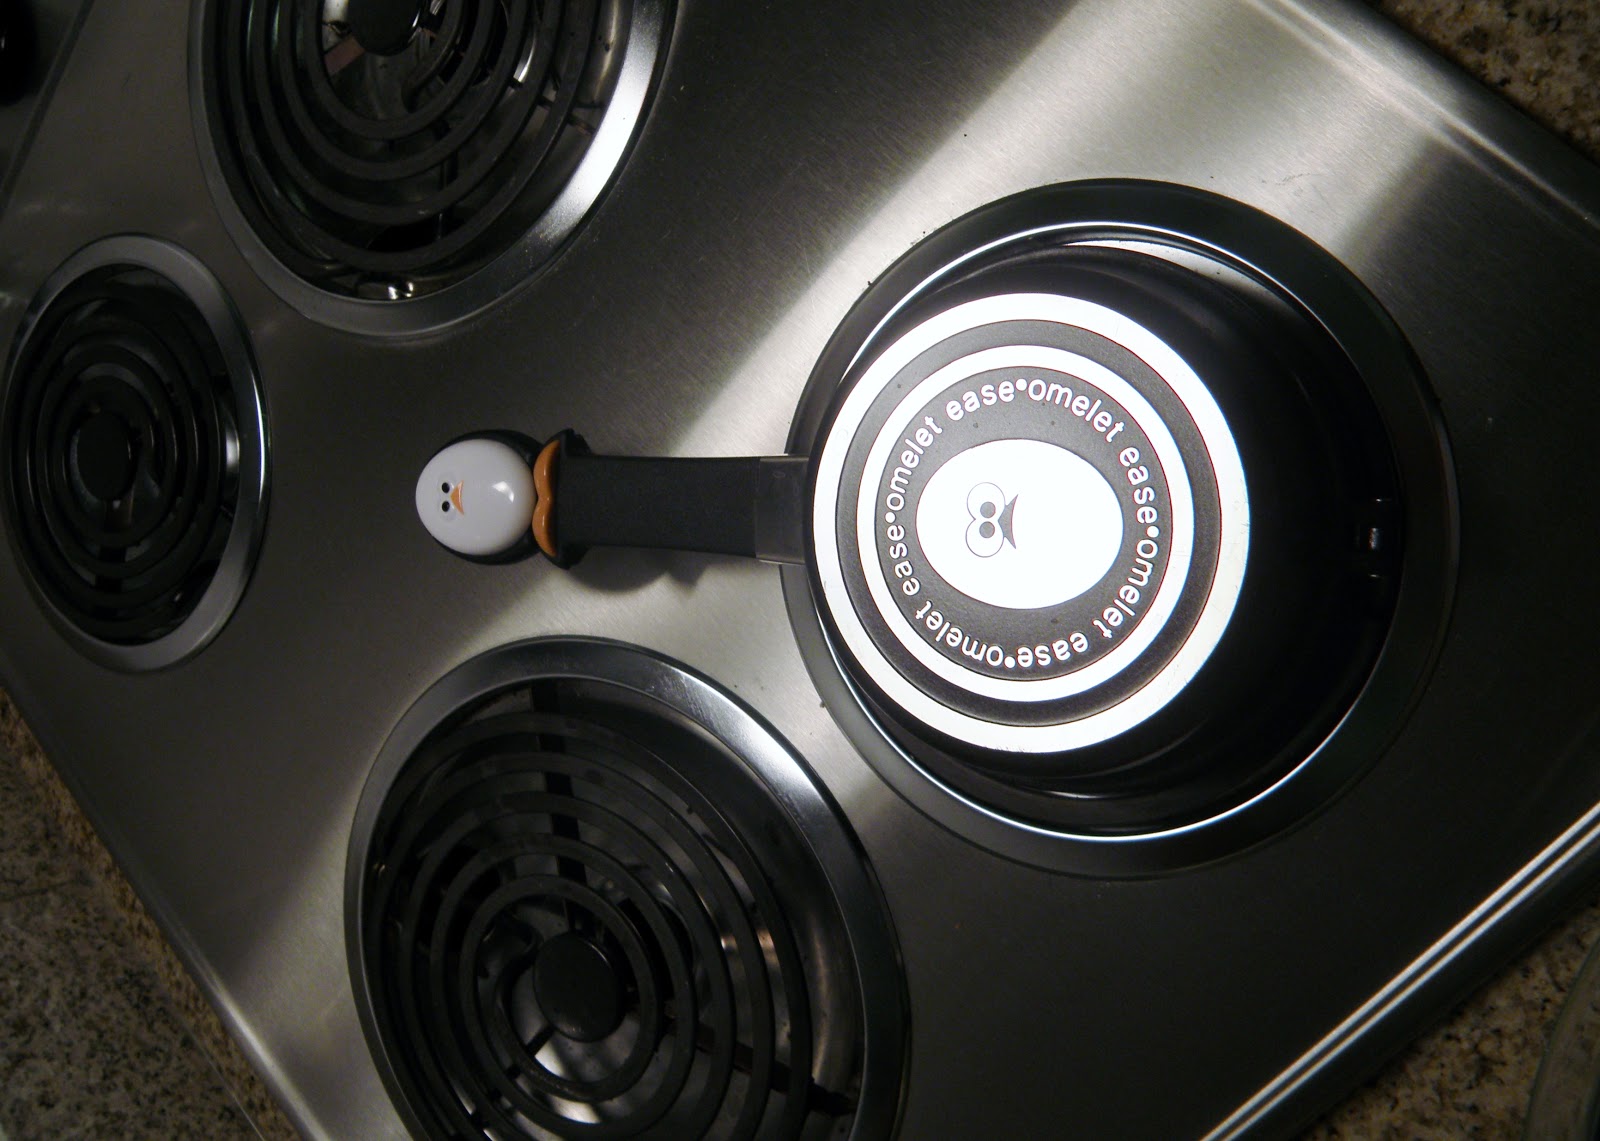
I love kitchen gadgets! Anything to make my time spent in the kitchen a little easier is always welcome ... so when I received this little Omelet Ease gadget as a gift at my Kitchen Gadget Party, I was psyched!

The two-sided omelet making pan is super convenient, efficient and easy to clean up, which is important, ... plus the little egg guy on the pan is super cute! The pan definitely makes flipping an omelet way easier. I have a terrible time attempting to make a perfect omelet in a regular pan - I typically end up making scrambled eggs instead! The perfectly proportioned omelet produced makes for a quick breakfast, lunch or dinner!


To use the Omelet Ease do the following:
  1. Mix up your egg mixture (it was eggs, milk, green pepper and onions for us this night).
  2. Spray the insides of both sides of the omelet pan with cooking spray.
  3. Place the omelet maker on the stove over medium-high heat.
  4. Once hot, pour or scoop the egg mixture into one side of the pan, close the pan, push the egg character on the handle of the pan down toward his feet to lock the pan closed, and let cook for about 2-3 minutes.
  5. Then, flip the pan onto it's other side for about 2-3 minutes.
  6. Serve. 
  7. Simply clean with soapy water once the pan has cooled down - it only takes a second.
I have seen these pans online starting around $15.00 and have also seen higher-end designs at much higher prices. My version did not come with very good directions, so that is why I included them above.

I likely would not have purchased this gadget for myself but since I received it as a gift, I now have an appreciation for the idea. I figured I would share the clever invention with you ... a busy family or single person just might find this quite useful.

I LIKE IT!

Don't forget to subscribe to my blog if you like what you read - simply submit your email address in the field above to begin receiving my blog posts via email.

4.17.2013

DIY Wall Photos

Following our trip to London and Paris in 2012, I was inspired to create wall art with some of the photos we took on our trip. I further decided that I didn't want the art to be limited to our European photos since we have captured beautiful shots of landscapes in our other travels as well. So my husband and I sorted through all of the vacation photos from some of our favorite trips including London, Oxford, Paris, Niagara Falls, Lake Ontario, Colorado, Maine and Michigan and narrowed it down.

After the photos were chosen, I had to determine the best way to display them ... I found an inspiration image of a living room online that I have used as one of my inspirations for re-designing my living room, and there was an art collage on the wall in the inspiration photo that I chose to mimic (inspiration image below).


As a designer, I tend to adhere to the "Rule of Thirds" in graphic design and photography. This concept also pertains to interior design where the standard rule is that information and objects that appear in threes are more appealing, memorable, and effective than other numbers of objects. So ... the inspiration photo of the eight frames in two rows kind of threw me for a loop - though after much analysis, I determined that this grouping was quit nice and felt modern to me so I went for it!

To begin my photo project, I purchased eight 8X10 wood frames from Michael's. I then purchased poster board that I cut with a X-Acto knife to create custom-sized mats. For the photos, I pulled each photo into Adobe Photoshop, cropped them to 8X10" and added a dry brush artistic filter effect (below). I liked the way the dry brush technique turned the photos into paintings. It seemed to increase the visual interest. I printed each photo on regular printer paper, cut to size, assembled and hung on the wall. There are a number of photo editing programs out there that cater to all experience levels - Photoshop is the program I design in but any photo filtering type program can help you choose the right aesthetic for your photos!


The end result (below) is a colorful, personalized wall of art that reminds us daily of the great experiences we have had in the past. I love the way each picture turned out. I also like the contrast of the white mat and the solid brown wood frames against the landscapes and architecture of the photos. The photo collage helps add to the contemporary design of my living room, AND it is one-of-a-kind art just as is all of the art in my home. Surrounding myself with the beauty and memories of our experiences brings a smile to my face!


We liked the way this turned out so much that we plan to add to the photo collection as we continue to travel ... The trouble is, I am beginning to run out of wall space!

Don't forget to subscribe to my blog if you like what you read - simply submit your email address in the field above to begin receiving my blog posts via email.

4.14.2013

It's Camping Time Again!

I am a city girl with a love for fashion, dining out and, well, anything you can do in the city, but when I met my husband, a small town guy, he opened my eyes to a world of sleeping in the woods, outdoor activities and tasty camping food over a fire! We have incorporated camping into our summer activities for several years now and have found much enjoyment from just being in nature for a weekend at a time before returning to the hustle and bustle of our lives in the city.

This year our first camping trip was in Brown County State Park, just an hour or so South of Indianapolis in Nashville, IN. Despite the fact that the temperature was abnormally low during our stay, we enjoyed two nights of camping with great company!

I am not sure what I like best about our camping experiences - the hiking? the fire? the food? ... there is something so relaxing and calming about being outside in nature. It gives me time to think and veg out for a bit. Brown County State Park is beautiful! There is a campground inside the park, hiking and mountain biking trails galore as well as horseback riding and more. 

Hiking is quite soothing for me. I enjoy just walking around in the woods looking at the trees and listening to the wind and the birds. During this particular trip, I hiked a 2.2 mile trail twice. This trail winded through trees, a creek and had several changes in incline. It was a bit challenging but still very calming.


I had to snap a photo of myself on the trail because it was just such a beautiful day!


Hanging out around the fire is another part of camping that brings me closer to nature. The fire is necessary for warmth, cooking and has a knack for enhancing conversation. Half the fun (and work) of camping revolves around building and maintaining the fire. My husband is the fire master and highly enjoys this part of the camping experience.


The wildlife around the park is always unpredictable. We always have to be on the look out for raccoons looking to steal our food throughout the night - during this trip a raccoon somehow unzipped by sister-in-laws backpack and stole peanut butter crackers! The first night we camped we heard some type of animal brush by our tent and the next morning my dog discovered this deer antler! It was pretty neat!


My husband and nephews, along with the pup, went on a search for deer tracks to see if they could find another antler - they only found one track but had great fun tracking the animal - I love this picture of the boys!


A good portion of our experience is always spent on cooking. We like to try new recipes on each trip and sometimes think we eat better camping than we do while at home! Breakfast usually consists of bacon, sausage, eggs and coffee slow cooked over the fire. It is a great way to start our day.


During this trip we cooked hot dogs for lunch, chicken kabobs for dinner one night and marshmallows for dessert, of course! The first night we cooked foil packs of cubed steak, shrimp, red onions, red potatoes, banana peppers, lemon pepper marinade and a bit of salt and pepper. This concoction was my husband's masterpiece, and it was delicious! We had never tried shrimp over the fire and this combination turned out to be extremely flavorful! We prepared individually-sized foil packs for each person prior to leaving for our trip. To cook, we simply put the foil packs directly on the fire to cook. After 20-30 minutes, dinner is served!


I sometimes can't believe that I enjoy camping as much as I do - like I said, I have always been a city girl through and through. I attribute my change in attitude to my husband who has encouraged me to try the things that he finds pleasure in and then make up my own mind if it is an experience that I enjoy. I discovered, with his help, this particular idea of allowing myself to just be - be peaceful, be with nature, be active, be relaxed ... it is a feeling and an experience that I will continue to find pleasure in for years to come!

4.09.2013

Resistance Bands

I love to try new things - even workout equipment ... So when I won these resistance bands - Gold's Gym Power Tone Plus - from a work Christmas party this past Christmas, I put them to good use. I had never used exercise bands before and wasn't even quit sure how to use them but was lucky that this set came with a workout plan with detailed written directions and pictures.


The band includes a door strap which is how I use them most, though the door strap is not necessary to use all resistance bands. To use the band with the door strap, you attach the strap to virtually any door by opening the door, placing the door strap either over the top or down the side of the door and then close the door. The strap is firmly in place and your resistance band is threaded through the strap, ready for you to use.

The exercise options with the band is almost endless - the exercises range from arms to legs to core and when used for a good amount of time, you can really feel the resistance getting harder as the routine progresses. You use the built-in resistance of the band to complete exercises such as leg dips with bicep curl, lunges with chest press, leg dips with bicep curls, tricep extensions, etc. I typically follow the routine outlined in the instruction manually - here are a few of the exercises (sorry the picture isn't so great):


Benefits:

Variety: There are a number of resistance band choices on the market in a number of resistances, so you can find some to meet your needs. You can work your chest, arms, shoulders, back, legs and core with one piece of equipment. You can determine the difficulty level as well. Some bands come with a door strap or a strap can be purchased separately. You can use the bands with or without the strap.

Convenient: The bands are portable and lightweight and can be stored anywhere - not a bad tool to take along when traveling either!

Affordable: These bands only cost $16. The elasticity may weaken overtime requiring you to replace the bands, but I think the price is about right.


I have found that I really like being able to incorporate this strength training workout into my week. This is a go-to workout for me when I am pressed for time or my energy level is lower and I don't feel like running or boxing. Once you are comfortable with the exercises and know how to use the bands, you can effectively work all of the muscles in your body without the need of dumbbells or other equipment. 

Here are some links to sites that outline workouts if the set you have/get doesn't come with directions:


Don't forget to subscribe to my blog if you like what you read - simply submit your email address in the field above to begin receiving my blog posts via email. 

4.06.2013

BBQ Chicken Hawaiian Flatbread Recipe

I'm proud of this BBQ Chicken Hawaiian Flatbread Pizza recipe! Not that this is new in concept but instead that I threw together this recipe, and it turned out delicious! I had been craving BBQ sauce and had the other ingredients on hand - so this was a perfect solution, a fusion of BBQ chicken pizza and Hawaiian pizza!


 BBQ Chicken Hawaiian Flatbread Recipe

 Ingredients:
  • Dough - I purchase whole wheat dough from Trader Joe's - it is fresh and cheap - less than $2 - or you can make your own
  • 1 cup chicken - cooked and chopped into small pieces
  • 3/4 cup pineapple - cut into small pieces
  • 2-3 wedges of Laughing Cow Cheese
  • BBQ sauce to taste
  • 1/4 cup bacon - fried and crumbled (optional)

Instructions:
  1. Preheat oven to 475 degrees F and grease a baking sheet or two depending of the number of flatbreads you are baking.
  2. Cook chicken in a skillet and chop into small pieces.
  3. Cut pineapple into small pieces.
  4. Roll dough thin - I elected to roll out 2 small individually-sized flatbreads and 1 larger flatbread (shown above).
  5. Place dough on greased baking sheet(s).
  6. Spread cheese on dough - just a thin layer will do it!
  7. Top with chicken, pineapple, BBQ sauce, bacon and additional dollops of cheese.
  8. Bake in oven for 10-12 minutes or until crispy.
  9. Cut and serve. 

The crispy crust along with the tangy BBQ sauce and the sweet pineapple is magical. Add in the bacon and the cheese and you have yourself an explosion of flavors in your mouth.

This recipe is a nice departure from the traditional pizza. I like pepperoni as much as the next person, but BBQ chicken and pineapple is a nice combo. Plus, by rolling the dough out thin to create a flatbread, your dough will go further, feeding more. The Laughing Cow Cheese - I used the garlic and herb flavor - is low in calories (only 35 calories a wedge) and is used more for a bit of flavor and moisture, not so much to create a cheesy effect which is perfect for a flatbread that should retain its rigidness. 

There are several ingredients in this recipe and a bit of prep work so you will have to give yourself the time to prepare but the cook time is short making up for the time spent on the prep. You can use any meats or veggies that you have on hand to create a similar recipe - the key is the thin crispy crust. This flatbread makes for a nice Friday night meal paired with your favorite beer - yum-o!

Don't forget to subscribe to my blog if you like what you read - simply submit your email address in the field above to begin receiving my blog posts via email.

4.02.2013

Pole Dancing for Exercise - OK!

This past weekend my sister and I had quit the experience ... Pole Dancing for exercise! Say What?!?!

We attended the Intro to Pole class at Pole Up Fitness and Dance Studio, http://poleupindy.com/, on E. 96th Street to see what this pole dancing fitness craze is all about. I had a number of questions running through my head prior to attending this 1 hour class ... For one, am I going to make a complete fool of myself? ... For two, is pole dancing really a fitness challenge? ... For three, if Jessie Spano did it, can't I?

Well, all of my questions were answered pretty quickly as we began our Intro to Pole class ... YES ... YES ... and NO. Yes, I likely made a fool of myself, but it was worth the laughs. Yes, it was, in fact, a challenging workout for the whole body - arms, legs and core. And lastly, No, I of course looked nothing like Jessie Spano as I attempted to move around that pole, but I was ok with that! I won't quit my day job!


the class:
The class maxes out at 8 people and one instructor and the room holds 8 floor to ceiling poles and is surrounded by mirrors. The intro class that we took teaches you the basics of pole dancing and shows you what pole dancing is about. We began with a stretch, then learned some basic moves. We jumped right into risqué moves with names like "sexy kitty" which is kind of like a push up and stretches with a bit of suggestive movement. We did the stretching and basics on a mat without use of the pole.

We then began learning a short routine which consisted of stripper-like movements including a twirl around the pole. The moves were not too complicated and the routine was pretty easy to master. I think almost everyone in our class was comfortable with the routine by the end of the class, except one lady who didn't really seem to get it! When we mostly had the routine down, the lights were turned down, neon tube lighting was illuminated, and we completed the routine several times through to music - fast and slow.

We actually did better than we thought we would! The class felt more like a dance class than an actual pole dancing class to me, meaning the moves were rhythmic and not overly seductive - it wasn't raunchy or too over the top - it was more about attitude! We both have done some dance back in the day and are fairly musical, so we were good students.

the instructor:
The instructor was great! She was good at explaining the moves and offering advice when someone was struggling. At the end of the class, the instructor performed a full pole routine including climbing the pole, twisting and turning like a pro. Her strength was incredible. The routine she performed is apparently the routine that you would learn if you decided to continue taking the Pole Up class series - there are several levels of 8-week classes that increasingly get harder and more advanced.

the cost:
The class cost was only $15 for the intro class, though we scored a Living Social coupon dropping the cost to $10. The subsequent levels cost $225.00 for 8-weeks.

tips if you are interested in checking out the class:
  1. Go with a friend - everything is more fun with a friend!
  2. Have fun with it ... when else will you be able to dance around a pole!
  3. Wear regular workout clothes - leggings and a tank or t-shirt - and you will be barefoot - I was not sure what to wear before attending the class but we found out that our attire was just fine.
  4. Even if you don't intend on taking the subsequent classes, you should still give the intro class a shot ... there was no pressure to sign up for other classes and you learn a nice little routine even at the intro level. 
other offerings:
We are definitely glad we took this class, though I don't anticipate that we will be moving on to the other Poles Fitness Series classes that they offer. The studio does offer a number of other class options though including belly dancing, hoop dancing, Turbo Kick and Zumba that I might have to try. They also run a Back It Up Flash Mob Series charity event that might peak your interest, http://poleupindy.com/workshops-events/.

Overall, the experience was a blast. My sister and I laughed with each other as we attempted the routine ... we had fun with it ... we weren't taking it too seriously. On the other hand ... it seemed like everyone else in the class was super serious about it - each of the other people were there alone and didn't seem to think the whole idea was as funny as we did!

It was a decent workout and more importantly a rare experience that we likely won't try other than through a class like this. We definitely were pushed a bit out of our comfort zones, and we now know that neither of us have a stripping career in our future (thank goodness!), but it will definitely be an experience to laugh about for a long time!

Don't forget to subscribe to my blog if you like what you read - simply submit your email address in the field above to begin receiving my blog posts via email.